> For the complete documentation index, see [llms.txt](https://docs.uptiq.ai/llms.txt). Markdown versions of documentation pages are available by appending `.md` to page URLs; this page is available as [Markdown](https://docs.uptiq.ai/task-guides/manage-users-and-access.md).
# Manage users and access
Every Admin task in Control Center: invite people, set roles, organize teams, manage sign-in, and issue API keys.
This guide is organized by task. Find what you want to do in the list below, then follow the steps. Each task links to the reference page it comes from.
Access is invite-only: people sign in only after they're invited, whichever sign-in method they use. People hold account-wide **roles**; **teams** group people, scope them to spaces, and grant them specific agents and apps; integrations use **API keys**.
| Task | Go to |
| -------------------------------------------------- | ------------------------------------------------------------ |
| See who has access to the account | [Users](#see-who-has-access) |
| Invite a person | [Invite](#invite-a-person) |
| Change a person's roles | [Edit roles](#change-a-person-roles) |
| Sign in with Google or Microsoft | [Single sign-on](#sign-in-with-google-or-microsoft) |
| Sign in with email and password for the first time | [First sign-in](#sign-in-with-a-password-for-the-first-time) |
| Reset a forgotten password | [Reset password](#reset-a-forgotten-password) |
| See what each role can do | [Roles](#see-what-each-role-can-do) |
| Choose between two similar roles | [Choose a role](#choose-between-two-similar-roles) |
| Create a team | [Create a team](#create-a-team) |
| Invite someone new while creating a team | [Invite to a team](#invite-someone-new-to-a-team) |
| Add or remove team members | [Members](#add-or-remove-team-members) |
| Change someone's team role | [Team role](#change-someone-team-role) |
| Give a team access to agents and apps | [Data Permissions](#give-a-team-access-to-agents-and-apps) |
| Delete a team | [Delete a team](#delete-a-team) |
| Create an API key | [Create a key](#create-an-api-key) |
| See a sample request for a key | [Sample cURL](#see-a-sample-request-for-a-key) |
| Revoke an API key | [Revoke](#revoke-an-api-key) |
***
## :users: Users
### See who has access
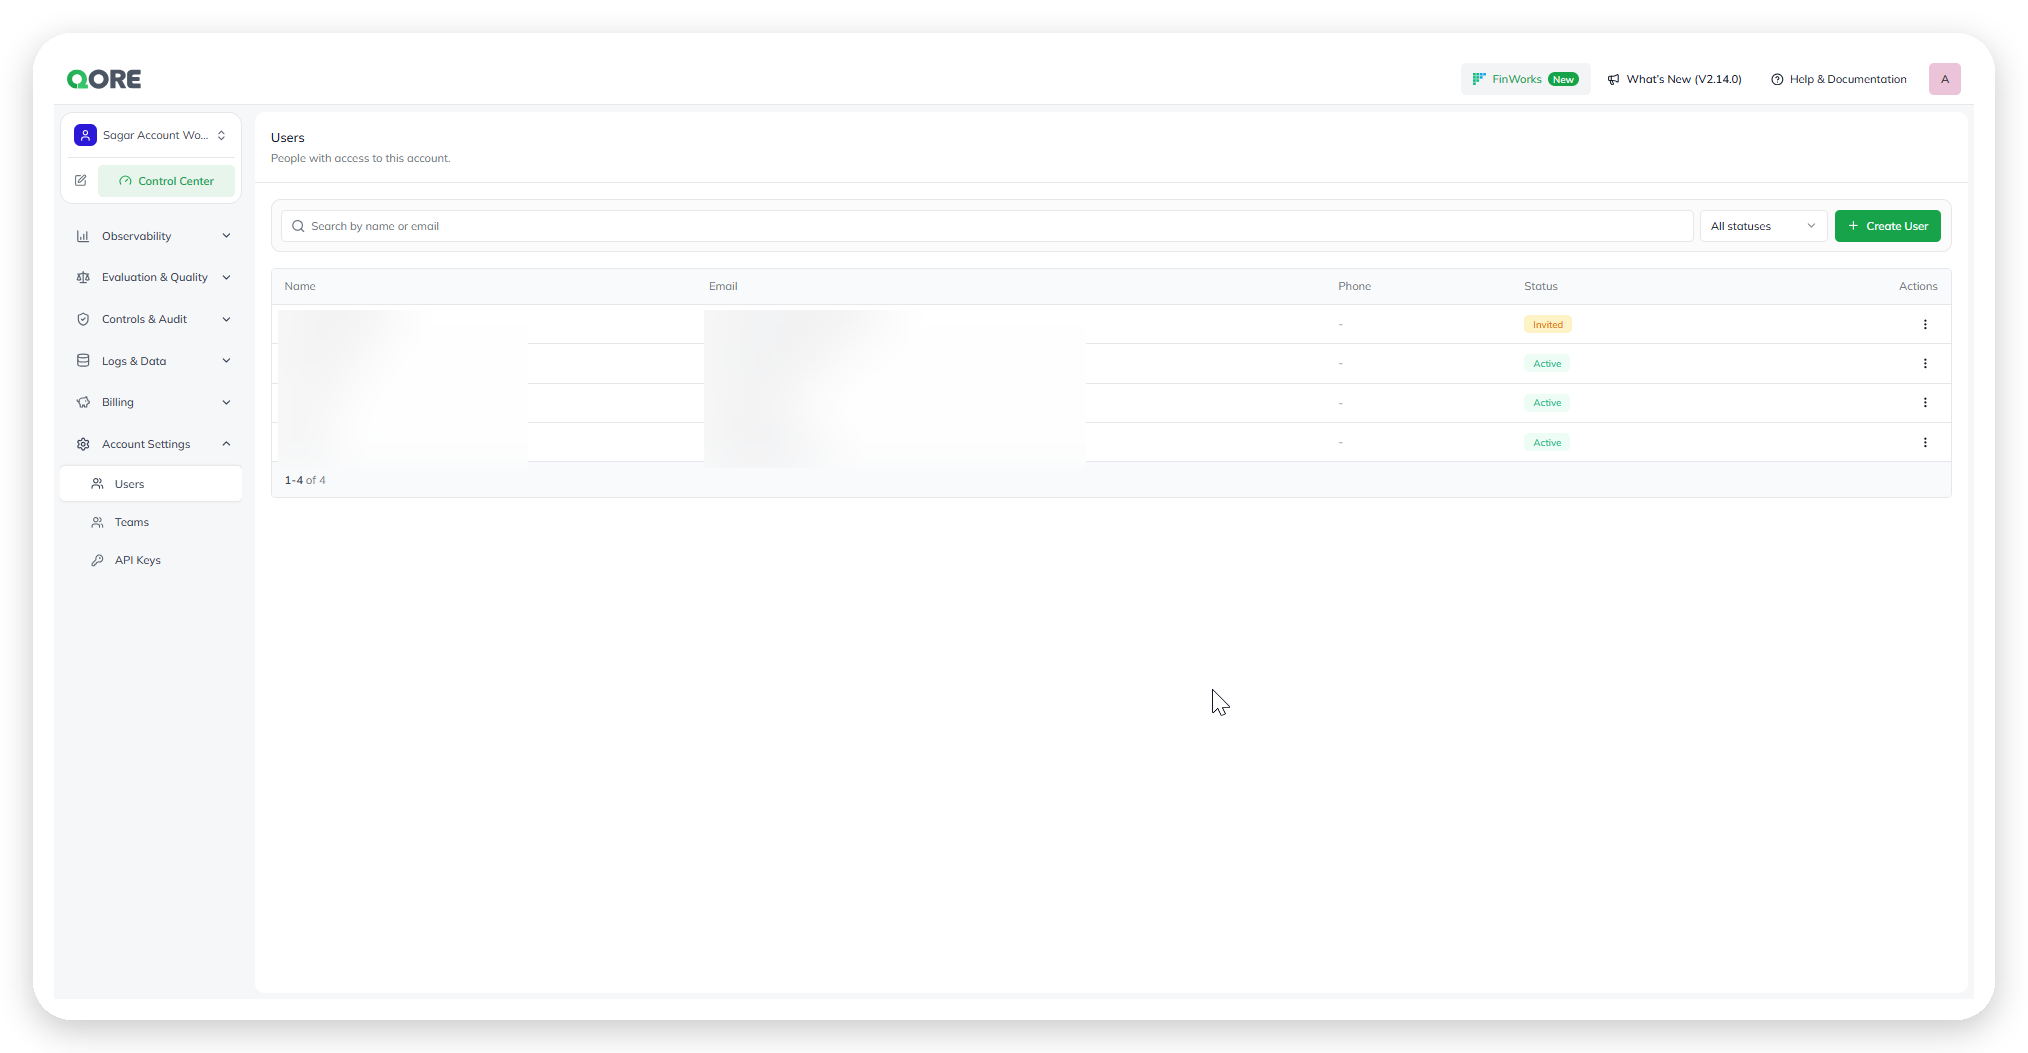
Open **Admin** › **Users**. Search by name or email, and filter by status. Each row shows the **Name**, **Email**, **Phone**, and **Status** (**Invited** or **Active**), with an **Actions** menu.
Users.
### Invite a person
{% stepper %}
{% step %}
#### Open Create User
On **Users**, select **+ Create User**.
{% endstep %}
{% step %}
#### Fill in the details
* **First Name** and **Last Name** — required.
* **Email** — required. It receives the invitation and is the sign-in identity. Use the exact address they'll sign in with: their Google address for Google, or their Microsoft or Entra ID address for Microsoft.
* **Phone Number** — optional, with the country code.
* **Role** — required. One or more roles.
{% endstep %}
{% step %}
#### Save
Save the user. They receive an invitation with a temporary password.
{% endstep %}
{% endstepper %}
Reference: [Users](/control-center/admin/users.md).
### Change a person roles
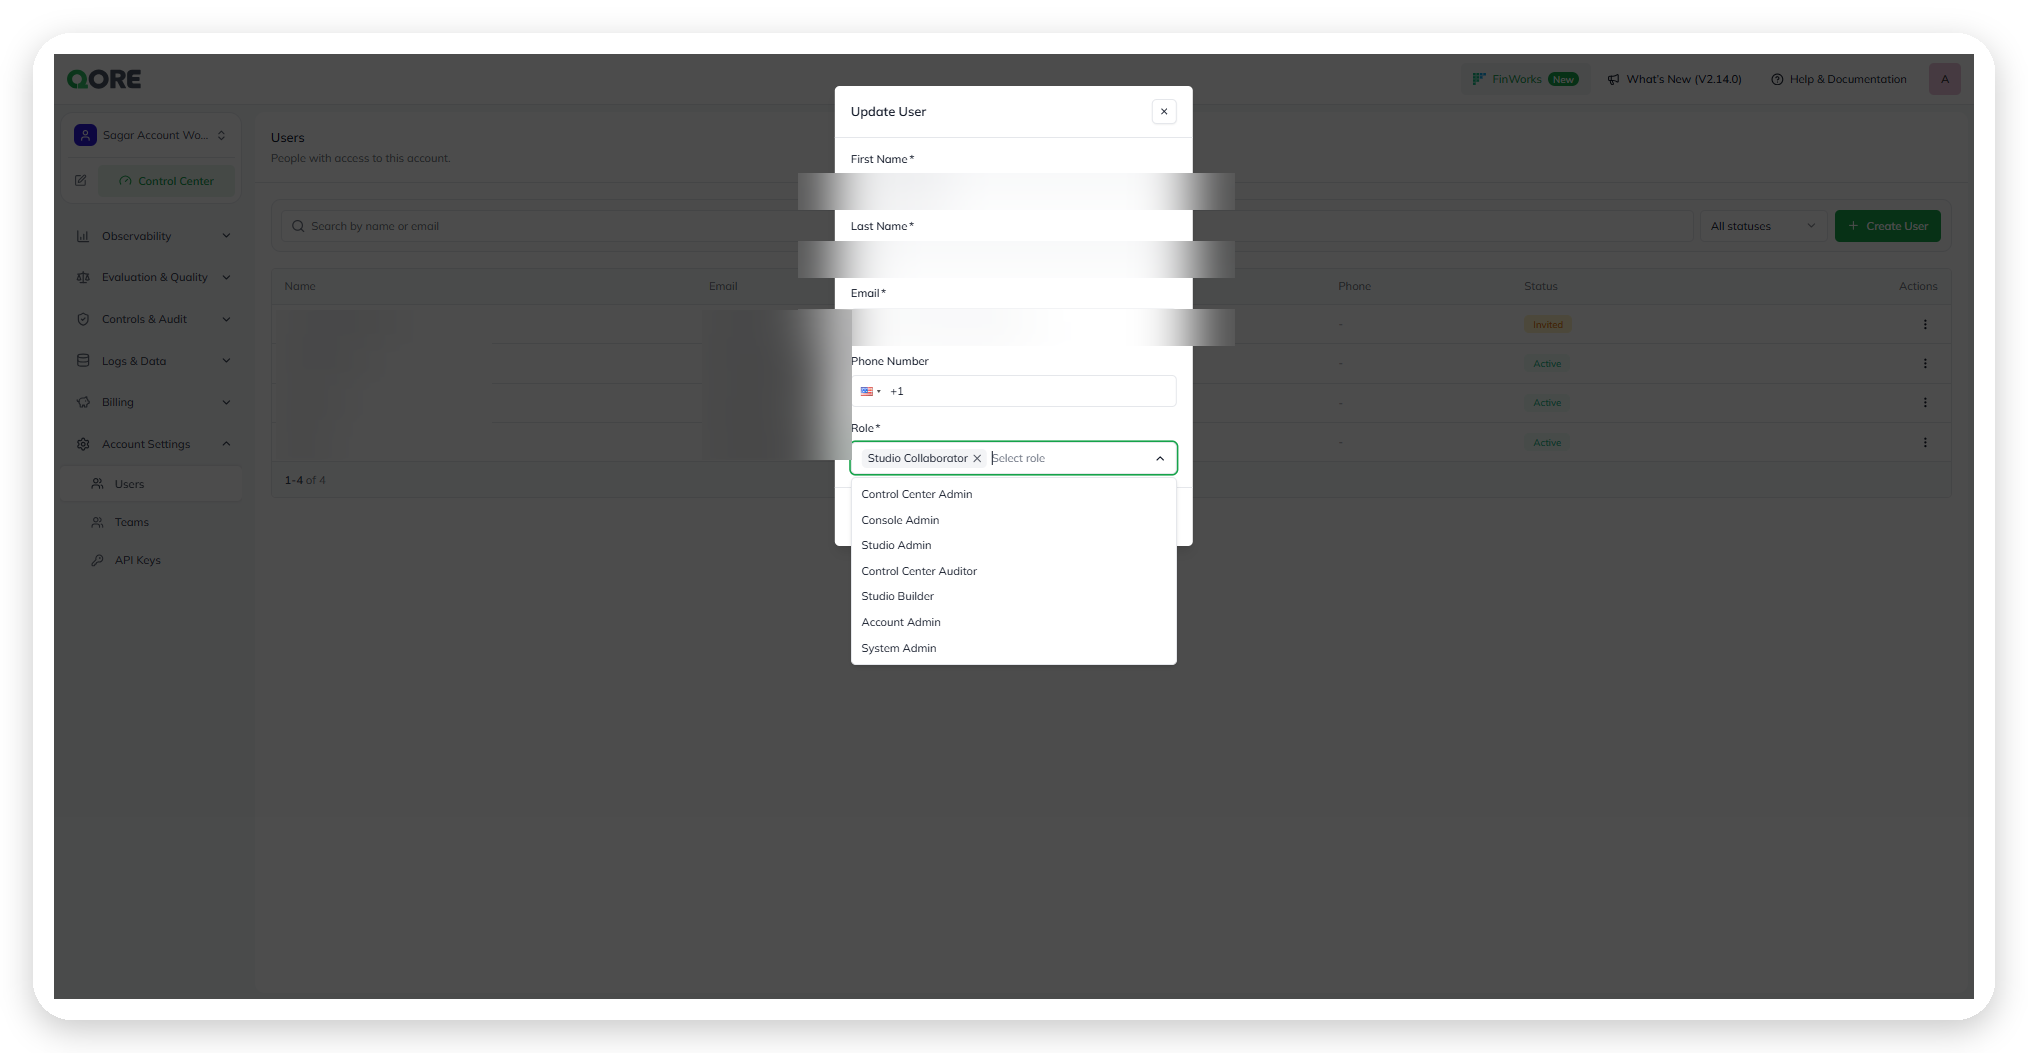
Use the user's **Actions** menu to manage them. Editing a user opens the same dialog as **+ Create User**; change **Role**, then save. Changing a role changes that person's access.
The Role field.
***
## :right-to-bracket: Sign-in
### Sign in with Google or Microsoft
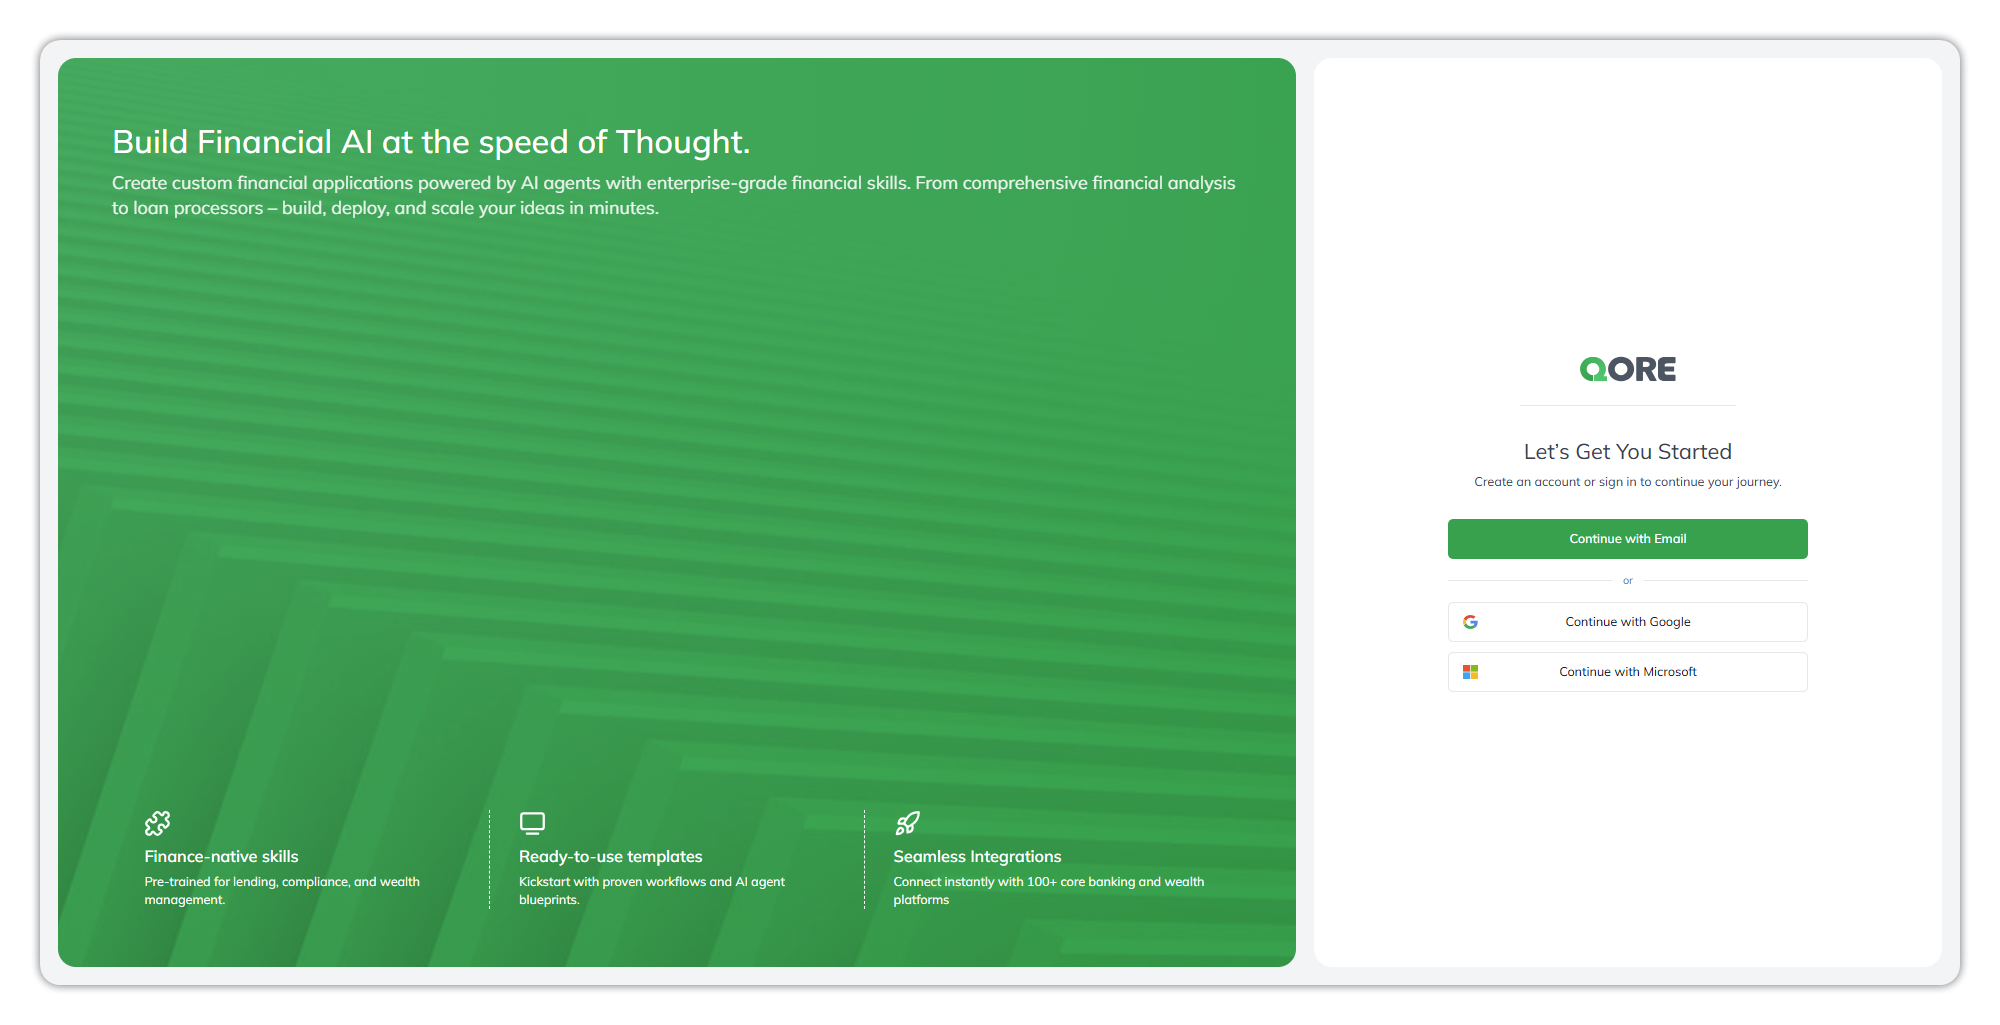
On the sign-in page, select **Continue with Google** or **Continue with Microsoft** (a Microsoft Entra ID work or school account, or a personal Microsoft account), then sign in with that account. Qore opens, signed in. With Entra ID, your organization's own sign-in rules apply, including multi-factor authentication.
Which buttons appear is set per Qore deployment, not from Control Center. When neither is on, the page shows only **Continue with Email**.
The sign-in page.
An email that hasn't been invited gets a validation error. Reference: [Single Sign-On](/control-center/admin/single-sign-on.md).
### Sign in with a password for the first time
{% stepper %}
{% step %}
#### Enter your email
On the sign-in page, select **Continue with Email** and enter the address the invitation was sent to.
{% endstep %}
{% step %}
#### Enter the temporary password
Enter the temporary password from the invitation email, then select **Continue**.
{% endstep %}
{% step %}
#### Set your own password
**Update your Password** opens. Enter the **Current Password** (the temporary one), a **New Password**, and **Confirm Password**, then select **Update Password**.
{% endstep %}
{% endstepper %}
Later sign-ins: **Continue with Email**, your email, your **Password**, then **Continue**. Reference: [Password Sign-In](/control-center/admin/password-sign-in.md).
### Reset a forgotten password
On the password step, select **Forgot your password?**. Qore emails a temporary password to the invited address. Select **Back to Login**, sign in with it, then set a new password on **Update your Password**.
People who only sign in with Google don't have a Qore password to reset.
***
## :user-shield: Roles
### See what each role can do
Open **Admin** › **Roles**. Qore has eight standard roles: **Viewer**, **Billing Manager**, **Approver**, **Developer**, **Governance Manager**, **Auditor**, **Account Admin**, and **Organisation Admin**. Roles created in your organization appear under **Custom Roles**.
* A person can hold several roles in one account; their capabilities add up.
* Roles are held per account membership: a role in one account doesn't carry into another.
* **Organisation Admin**'s three tenant-level capabilities — create accounts, manage the organization brand, and manage organization roles — reach every account in the tenant.
For every capability by role, see [Roles › Capabilities by role](/control-center/admin/roles.md#capabilities-by-role).
### Choose between two similar roles
* **Organisation Admin or Account Admin** — Organisation Admin adds the three tenant-wide capabilities.
* **Governance Manager or Auditor** — Governance Manager can change governance resources; Auditor only inspects them and can view credit usage.
* **Developer or Approver** — Developer builds and publishes; Approver approves publishing but doesn't build.
* **Governance Manager or Account Admin** — Account Admin adds user, team, API key, AI Gateway, credit-limit, and agent-control administration.
* **Billing Manager or Auditor** — both view credit usage; Billing Manager can also set credit limits.
A person who only uses published apps and agents gets **Viewer**. Reference: [Roles](/control-center/admin/roles.md).
***
## :people-group: Teams
Teams group account members, scope them to spaces, grant them specific agents and apps, and route [Human Review](/task-guides/evaluate-agent-quality.md#review-a-low-confidence-result) assignments. Open **Admin** › **Teams**. Each team shows its **Team** name, **Spaces**, **Resource Access**, **Members**, and **Actions**.
### Create a team
{% stepper %}
{% step %}
#### Set up the team
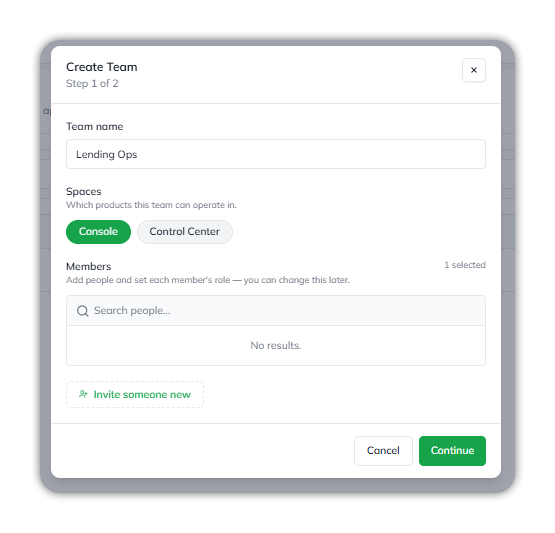
Select **+ Create Team**, then enter:
* **Team name** — such as *Lending Ops*.
* **Spaces** — **Console**, **Control Center**, or both.
* **Members** — search and check the people to add.
Select **Continue**.
{% endstep %}
{% step %}
#### Set agent and app permissions
Choose from **Agent permissions** and **App permissions**. Each list has a search field, a count such as *0 of 3 selected*, and **Select all** and **Clear**.
{% endstep %}
{% step %}
#### Create it
Select **Create Team**, or **Back**. The selections aren't saved until you select **Create Team**.
{% endstep %}
{% endstepper %}
Create Team, step 1.
Reference: [Teams › Create a team](/control-center/admin/teams.md#create-a-team).
### Invite someone new to a team
In step 1, select **Invite someone new**. Fill in **First Name**, **Last Name**, **Email**, **Role** (one or more account-wide roles), and **Team Role** (**Member** or **Admin**); every field is required. They're invited to the account and added to the team once it's created.
In an existing team, select **+ Add Member**, then **Invite New User**.
### Add or remove team members
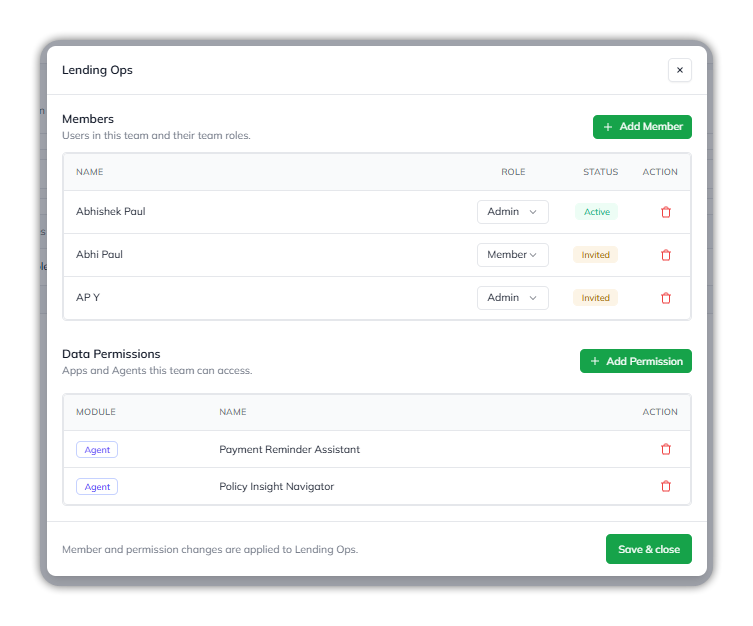
Select the team's row, or **Edit** in its **Actions** menu. Under **Members**, select **+ Add Member** and the **+** next to a person, or use a member's delete action. Select **Save & close** to apply.
A team's dialog.
### Change someone team role
In the team's dialog, open the **Role** dropdown in the member's row and choose **Member** or **Admin**, then select **Save & close**. A team role only affects what they can do within the team; their account-wide roles still govern everything else.
### Give a team access to agents and apps
In the team's dialog, under **Data Permissions**, select **+ Add Permission**, search the account's agents and apps, and select the **+** next to each. Remove one with its delete action. Select **Save & close**.
Members can access the team's agents and apps; what they can do with them still comes from their roles.
### Delete a team
Open the team's **Actions** menu, then **Delete**.
Reference: [Teams](/control-center/admin/teams.md).
***
## :key: API keys
{% hint style="info" %}
The account-wide platform key created here, sent as `x-platform-key`, isn't accepted by agent runtime routes. To call an agent, use its agent key or widget key from [Integrate an agent](/task-guides/integrate-an-agent.md). None of the key types expire or support rotation today.
{% endhint %}
### Create an API key
{% stepper %}
{% step %}
#### Open Create API Key
Open **Admin** › **API Keys**, then select **+ Create API Key**.
{% endstep %}
{% step %}
#### Name it and grant permissions
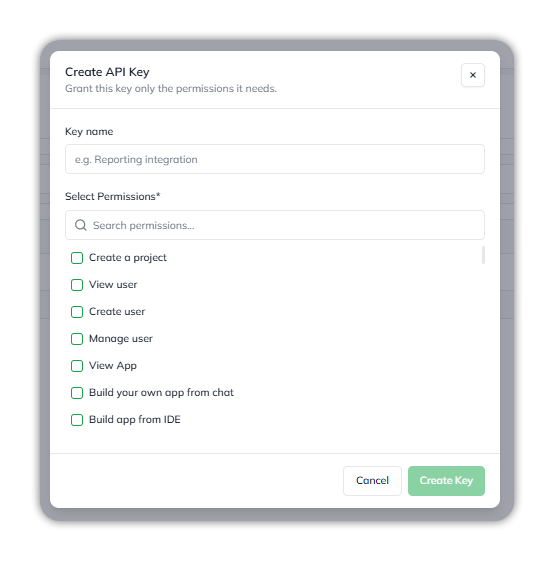
Enter a **Key name**, such as *Reporting integration*. Under **Select Permissions** (required), search and check each permission the key needs. The permissions are the account's capabilities, the same set roles carry.
{% endstep %}
{% step %}
#### Create and copy it
Select **Create Key**. **Your key has been generated** shows the key once; select the copy icon. **Example — API Key Usage** shows a sample request with the `x-platform-key` header. Select **Done**.
{% endstep %}
{% endstepper %}
Create API Key.
{% hint style="warning" %}
API keys can carry account-management permissions. Grant only what's needed, and store the key securely.
{% endhint %}
### See a sample request for a key
Open the key's **Actions** menu, then **Sample cURL**. Replace the `` placeholder with the key you copied.
### Revoke an API key
Open the key's **Actions** menu, then **Revoke**.
Reference: [API Keys](/control-center/admin/api-keys.md).
***
## :triangle-exclamation: Common issues
For sign-in, team, role, and API key problems, see [Admin: FAQs & Troubleshooting](/control-center/admin/admin-faqs-and-troubleshooting.md).
***
## :link: Related pages
* [Admin](/control-center/admin.md), [Users](/control-center/admin/users.md), [Teams](/control-center/admin/teams.md), [Roles](/control-center/admin/roles.md), and [API Keys](/control-center/admin/api-keys.md)
* [Single Sign-On](/control-center/admin/single-sign-on.md) and [Password Sign-In](/control-center/admin/password-sign-in.md)
***
{% columns %}
{% column width="83.33333333333334%" %}
Maintained by Abhishek Paul AI-assisted, human-approved
{% endcolumn %}
{% endcolumns %}
---
# Agent Instructions
This documentation is published with GitBook. GitBook is the documentation platform designed so that both humans and AI agents can read, navigate, and reason over technical content effectively. Learn more at gitbook.com.
## Querying This Documentation
If you need additional information that is not directly available in this page, you can query the documentation dynamically by asking a question.
Perform an HTTP GET request on the current page URL with the `ask` query parameter, and the optional `goal` query parameter:
```
GET https://docs.uptiq.ai/task-guides/manage-users-and-access.md?ask=&goal=
```
`ask` is the immediate question: it should be specific, self-contained, and written in natural language.
`goal` is optional and describes the broader end goal you are ultimately trying to accomplish on behalf of the user. GitBook uses it to tailor the answer towards what is most useful for that goal.
The response will contain a direct answer to the question and relevant excerpts and sources from the documentation.
Use this mechanism when the answer is not explicitly present in the current page, you need clarification or additional context, or you want to retrieve related documentation sections.