> For the complete documentation index, see [llms.txt](https://docs.uptiq.ai/llms.txt). Markdown versions of documentation pages are available by appending `.md` to page URLs; this page is available as [Markdown](https://docs.uptiq.ai/task-guides/create-a-flow.md).
# Create a flow
Every Flows task, from describing an automation to testing, publishing, and using it from an agent.
This guide is organized by task. Find what you want to do in the list below, then follow the steps.
A **flow** is an automation of connected tasks. A trigger starts it, and each task passes its results onward. Every flow is also a skill that an agent can use.
| Task | Go to |
| ----------------------------------------------- | ---------------------------------------------------------------- |
| Create a flow by describing it in a chat prompt | [Create a flow from a prompt](#create-a-flow-from-a-chat-prompt) |
| Start from a ready-made template | [Start from a template](#start-from-a-template) |
| Create a flow while building an agent | [Create from an agent](#create-a-flow-from-an-agent) |
| Change the flow by chatting | [Change the flow](#change-the-flow-by-chatting) |
| Rename the flow | [Rename the flow](#rename-the-flow) |
| Choose what starts the flow | [Add a trigger](#add-a-trigger) |
| Add a step to the flow | [Add a task](#add-a-task) |
| Fill in a task's settings | [Configure a task](#configure-a-task) |
| Define what the flow takes in and returns | [Flow I/O](#define-the-flow-inputs-and-outputs) |
| Store credentials and shared values | [Variables](#add-secrets-and-global-variables) |
| Run the flow with test data | [Try Out](#test-the-flow) |
| Answer an approval request during a run | [Approve a run](#respond-to-an-approval-request) |
| Make the flow available | [Publish](#publish-the-flow) |
| Go back to the published version | [Version History](#review-versions-or-undo-draft-changes) |
| See past runs | [Execution History](#see-past-runs) |
| Let an agent use the flow | [Use with an agent](#let-an-agent-use-the-flow) |
| Find one of my flows | [Find a flow](#find-one-of-my-flows) |
| Open a flow to keep working on it | [Edit a flow](#open-a-flow-to-keep-working-on-it) |
{% hint style="info" %}
**Flows are in preview.** The experience may change. Flows are project-scoped: a flow is available only in its project.
{% endhint %}
***
## :diagram-project: Start a new flow
### Create a flow from a chat prompt
{% stepper %}
{% step %}
#### Open Flows
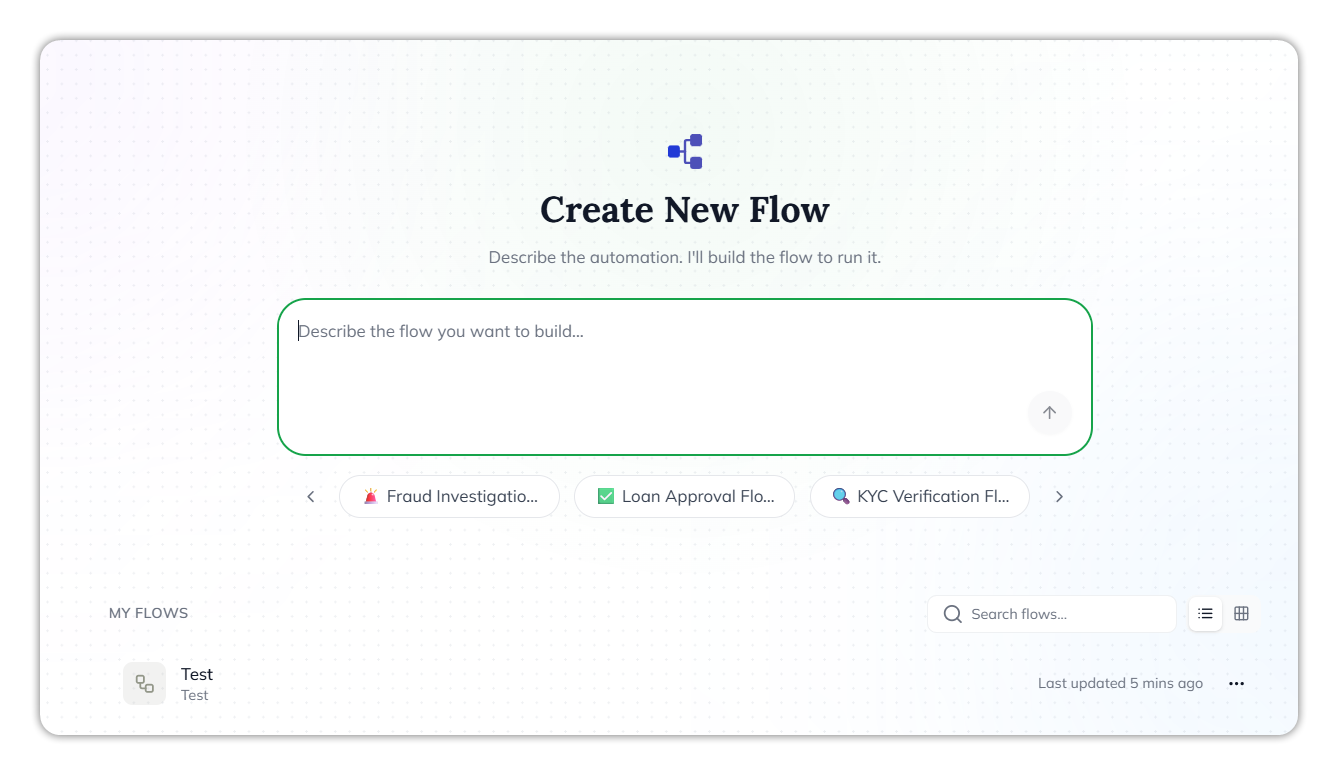
In **Console**, select a project, then select **Flows**. **Create New Flow** reads *Describe the automation. I'll build the flow to run it.*
{% endstep %}
{% step %}
#### Describe the automation
In **Describe the flow you want to build…**, enter what the flow receives, what it should do, and what it returns.
{% endstep %}
{% step %}
#### Send the prompt
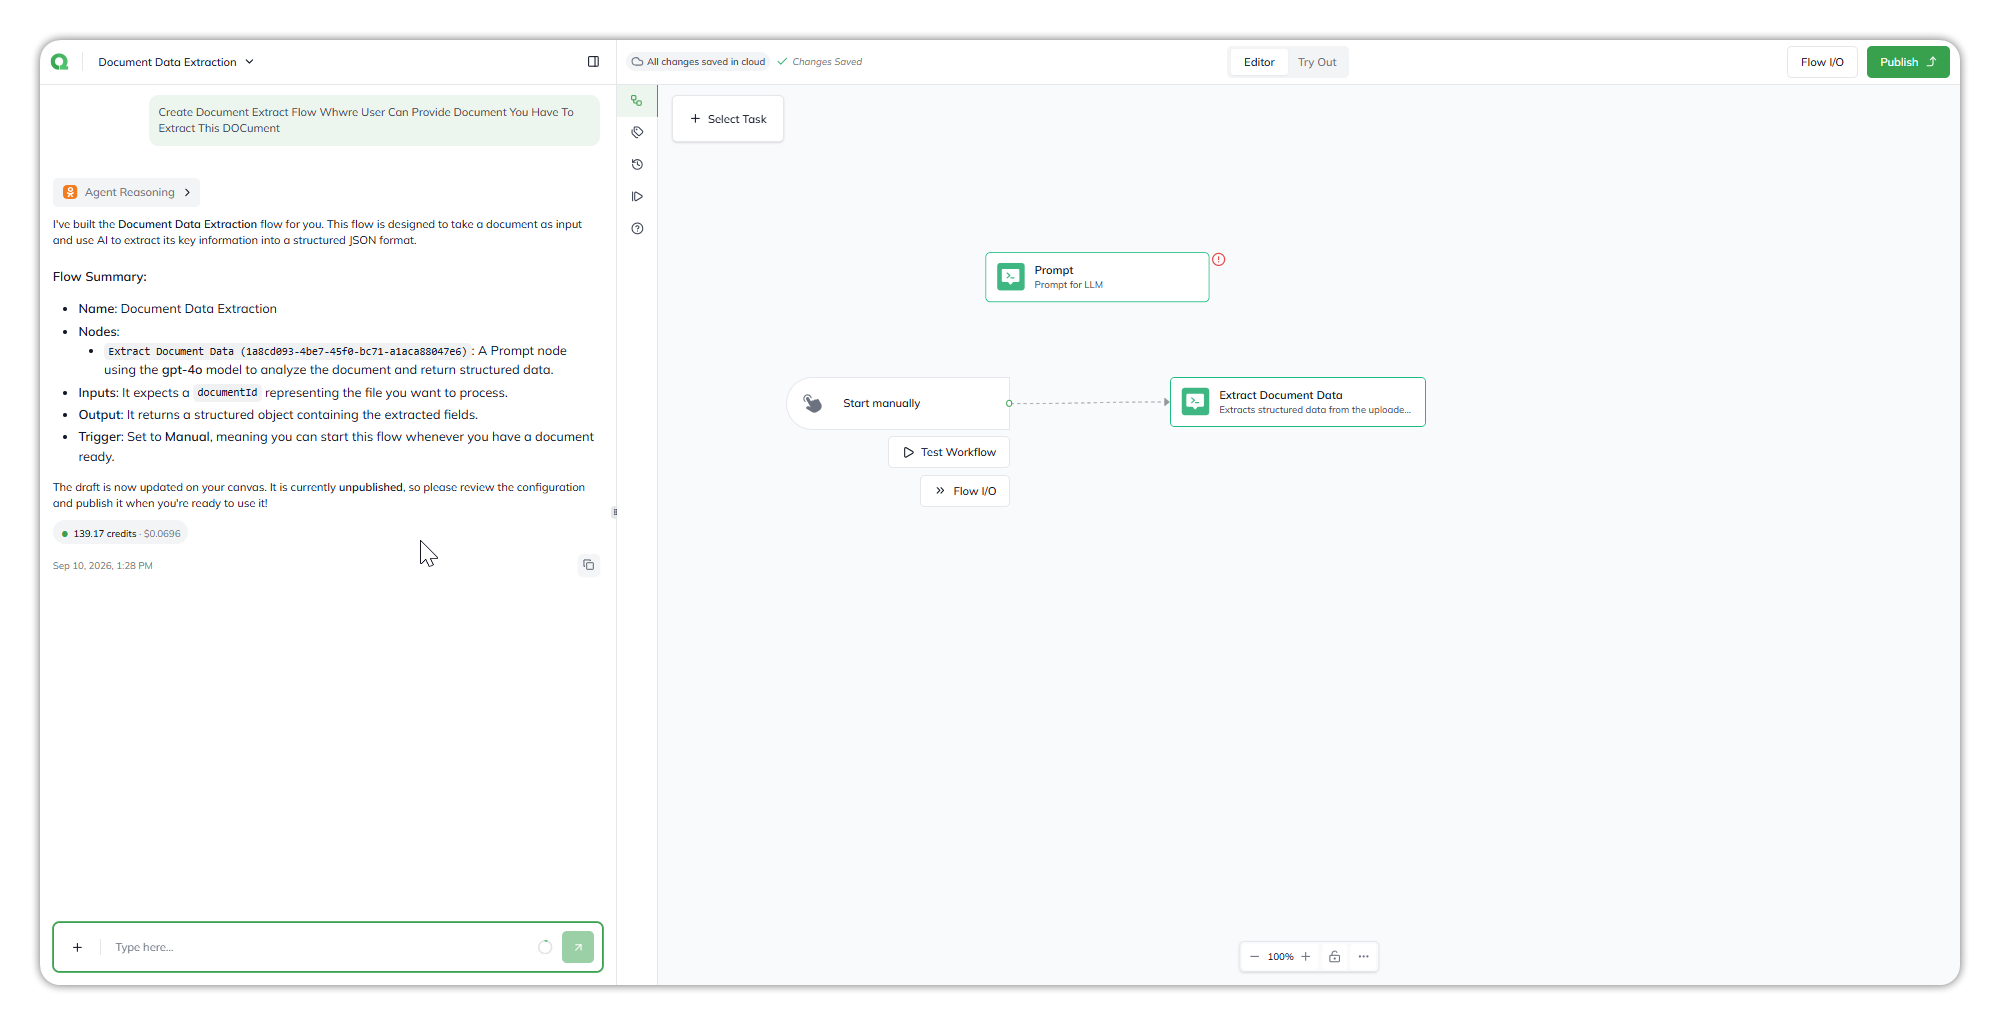
Select the send arrow. Qore creates a draft and opens it in the builder. The chat summarizes the flow's name, tasks, input, output, and trigger.
{% endstep %}
{% step %}
#### Refine the draft
Continue the conversation to request changes, or edit the flow directly. Open **Agent Reasoning** for the design rationale.
{% endstep %}
{% endstepper %}
Create New Flow.
A drafted flow, with the chat summary and the canvas.
### Start from a template
Template chips sit below the prompt box, such as **Fraud Investigation**, **Loan Approval Flow**, and **KYC Verification Flow**. Use the **‹** and **›** arrows to scroll through them. Select one to start from its description, then tailor the draft.
### Create a flow from an agent
{% stepper %}
{% step %}
#### Open the Flows tab
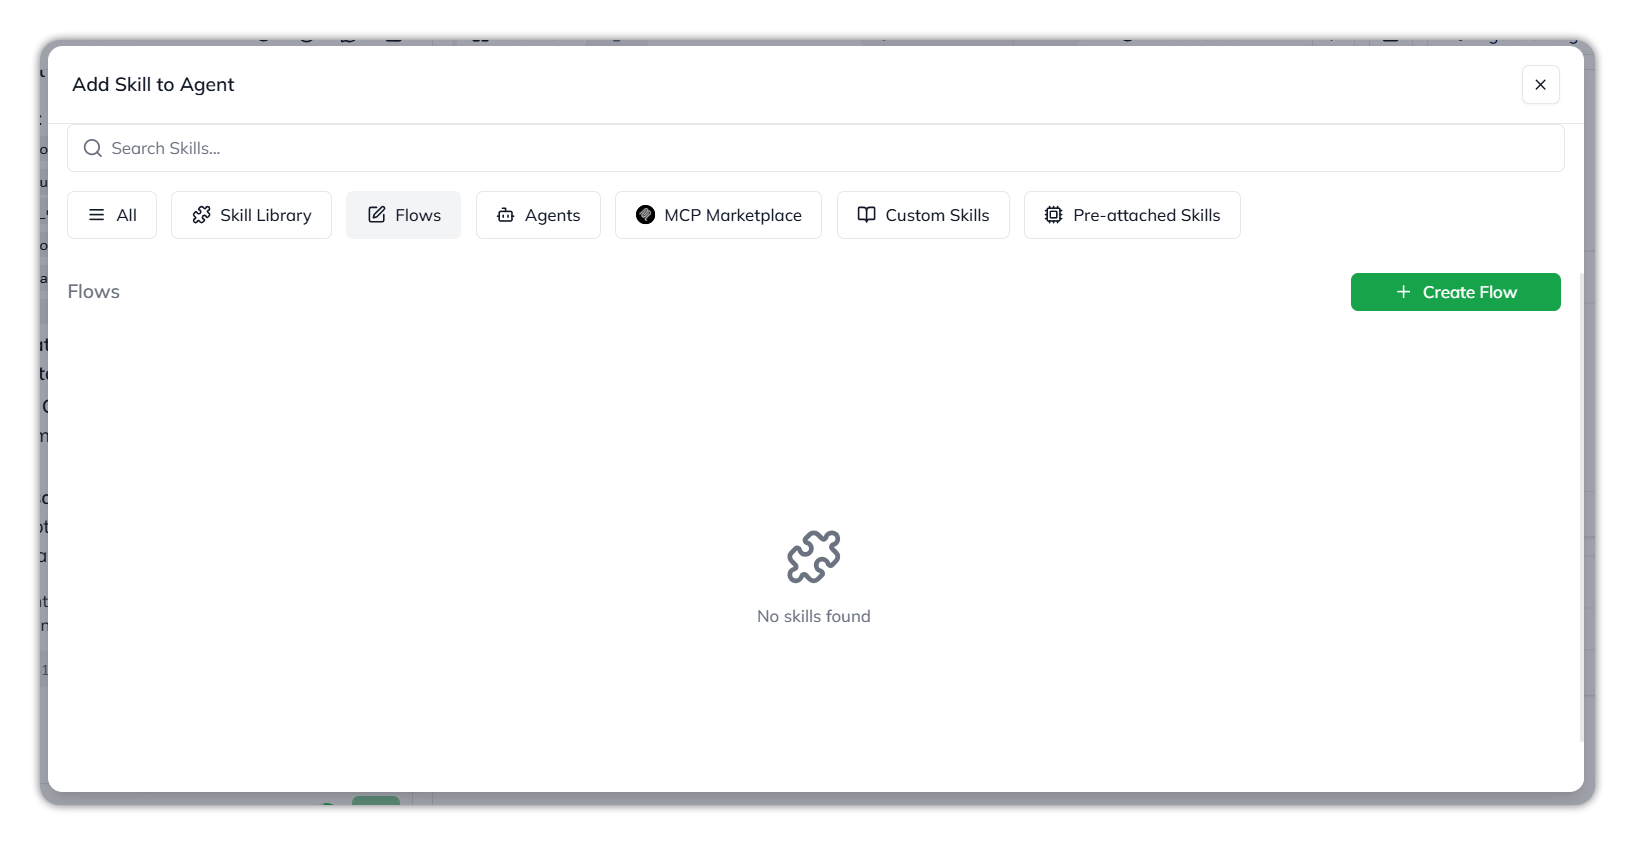
In an agent's **Add Skill to Agent** dialog, select the **Flows** tab. With no flows yet, it reads *No skills found*.
The Flows tab in Add Skill to Agent.
{% endstep %}
{% step %}
#### Select Create Flow
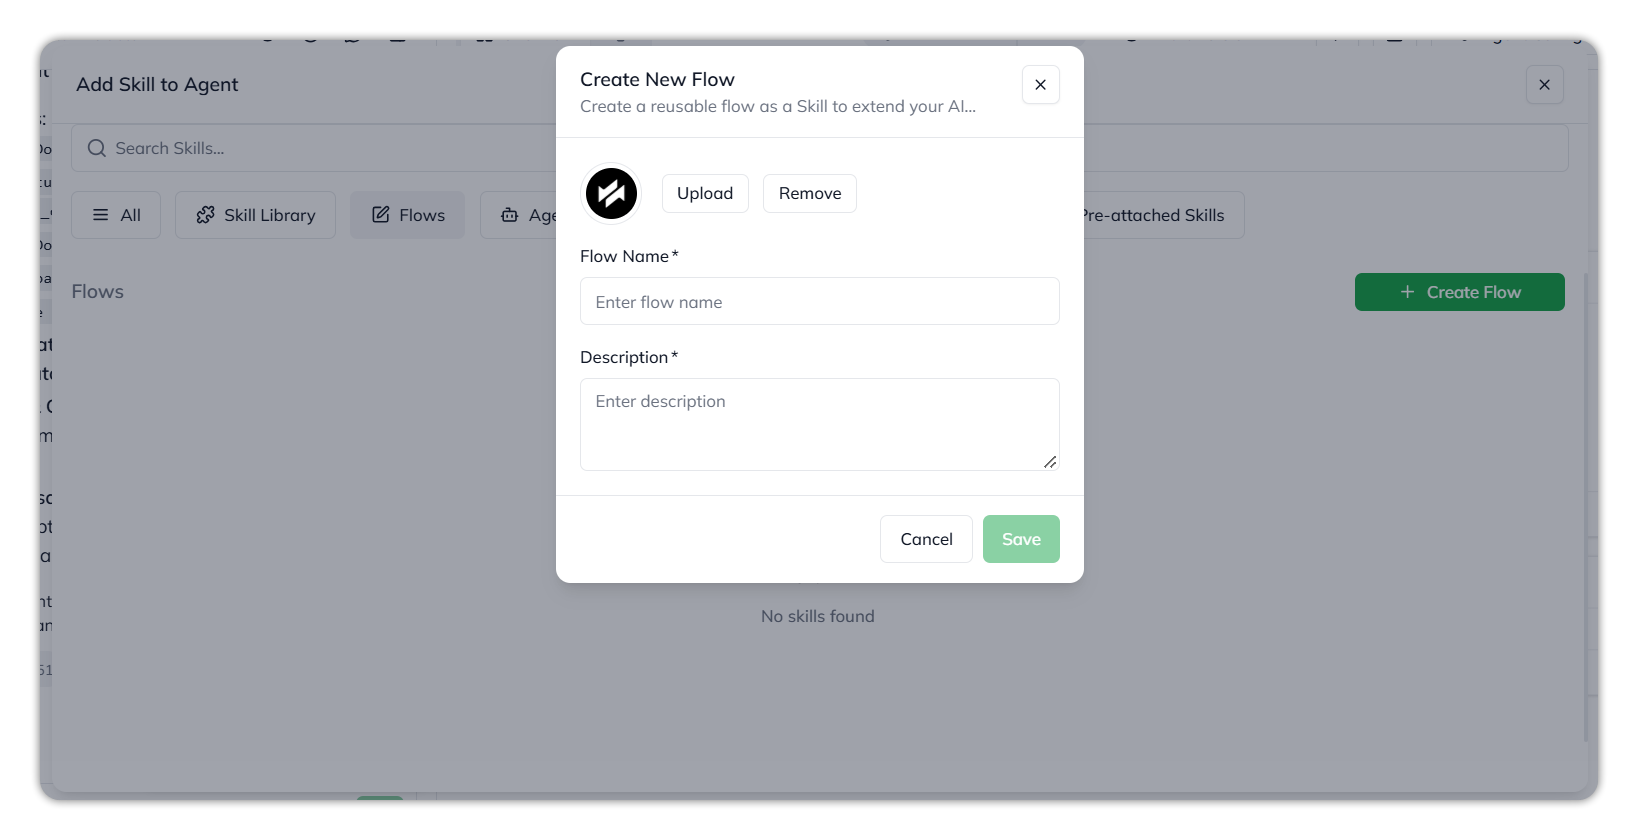
Select **+ Create Flow**. **Create New Flow** opens: *Create a reusable flow as a Skill to extend your AI…*
{% endstep %}
{% step %}
#### Name and describe the flow
Enter a **Flow Name** and a **Description**. Both are required.
To set the flow's image, select **Upload**, then **Click to upload or drag and drop** and choose an image up to 2 MB, and select **Upload Avatar**. **Remove** clears it.
Create New Flow.
{% endstep %}
{% step %}
#### Save
Select **Save**. The flow opens in the builder with an empty canvas, and the chat reads *Workflow "‹name›" created. How can I help to build your workflow?* The flow also appears in **My Flows**.
{% endstep %}
{% endstepper %}
***
## :pen-ruler: Work in the builder
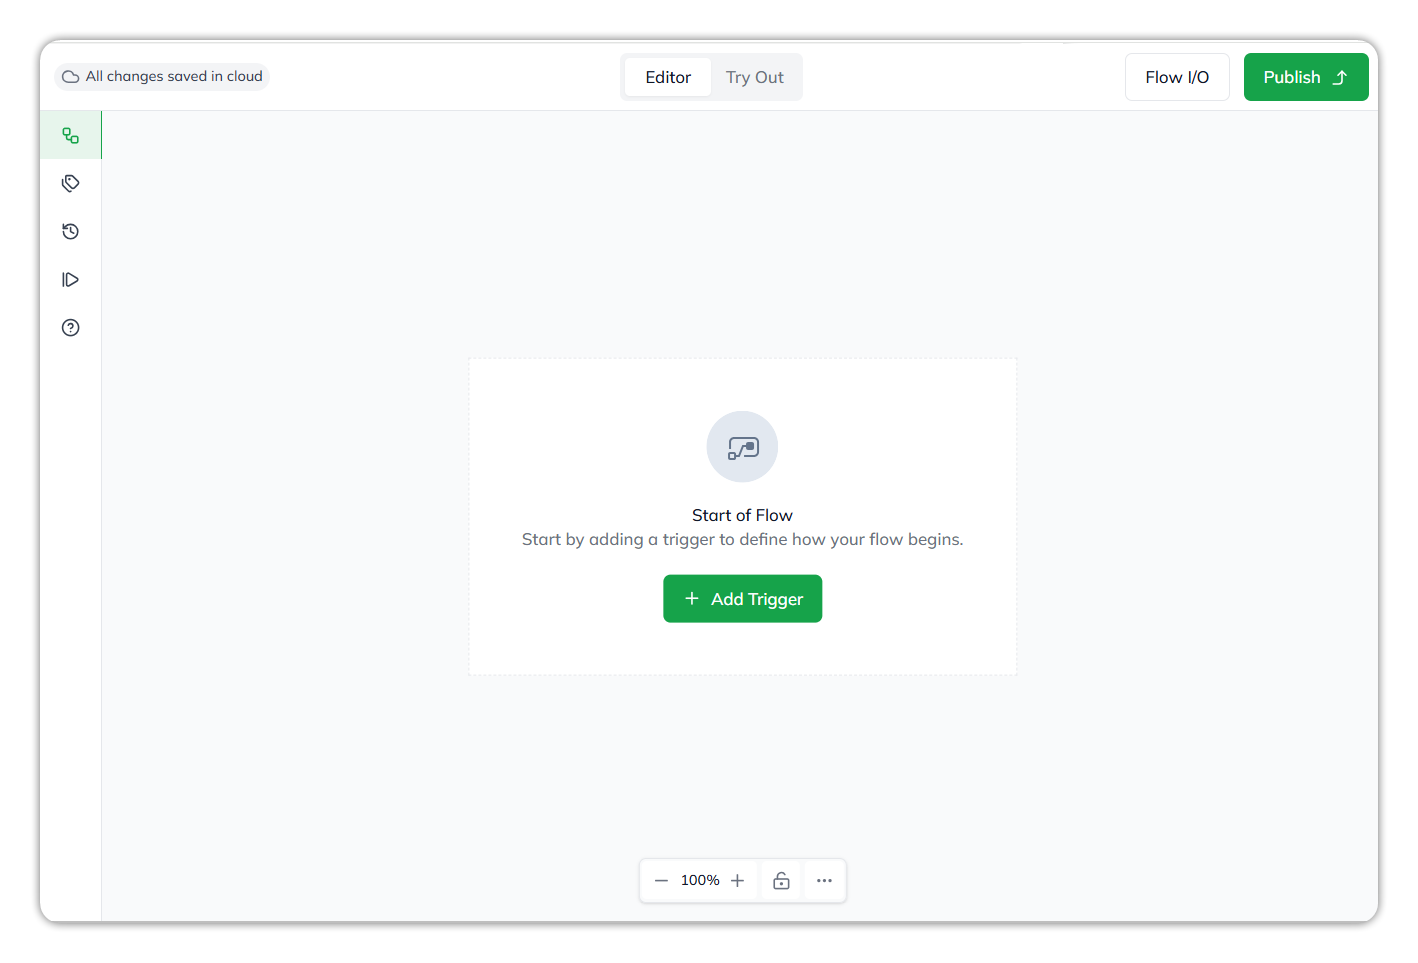
The chat is on the left, and the canvas is on the right.
A new flow in the builder.
| Item | What it does |
| ---------------------------- | ----------------------------------------------------------------------------------------------------------- |
| *All changes saved in cloud* | Shows that your changes are saved. |
| **Editor**, **Try Out** | Switch between building the flow and testing it. |
| **Flow I/O** | Opens the flow's input and output schemas. |
| **Publish** | Publishes the draft. |
| Rail icons | From the top: the flow canvas, **Variables**, **Version History**, **Execution History**, and help (**?**). |
| Zoom controls | **−**, the zoom level such as **100%**, **+**, a lock icon, and **•••**. |
The chat header holds the flow name and three icons: chat history, new chat, and the panel toggle.
### Change the flow by chatting
Type the change in **Type here…** in the chat, and send it. Qore updates the draft on the canvas.
### Rename the flow
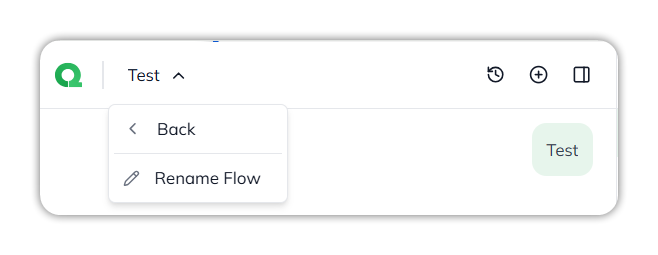
Select the flow name at the top of the chat, then **Rename Flow**. The same menu has **Back**.
The flow name menu.
### Add a trigger
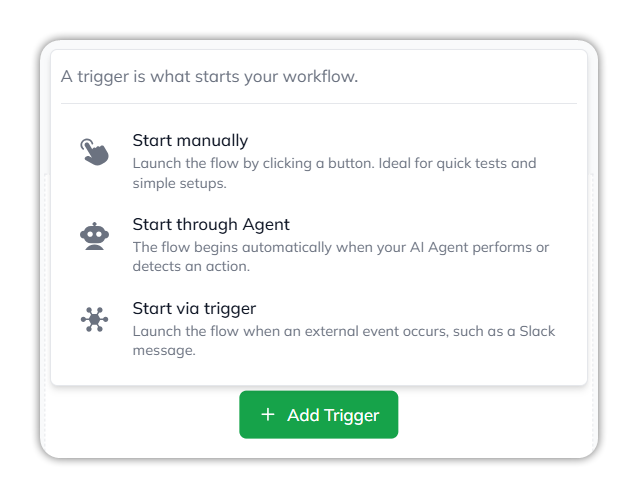
A new flow's canvas shows **Start of Flow**: *Start by adding a trigger to define how your flow begins.* Select **+ Add Trigger**, then choose one:
* **Start manually** — Launch the flow by clicking a button. Ideal for quick tests and simple setups.
* **Start through Agent** — The flow begins automatically when your AI Agent performs or detects an action.
* **Start via trigger** — Launch the flow when an external event occurs, such as a Slack message. This option is still in development.
The trigger options.
To change the trigger in a drafted flow, select it on the canvas.
{% hint style="info" %}
A flow trigger starts a flow. An agent's own triggers are set in the agent. See [Triggers](/console/agent-builder/build/triggers.md).
{% endhint %}
### Add a task
Select **Select Task**, or the **+** after a task. Search by task name, then select the task.
| Task | Purpose |
| ----------------- | ---------------------------------------------------------- |
| **Agent** | Runs an agent as a flow step. |
| **Prompt** | Sends a prompt to an AI model. |
| **Dataset** | Reads from or writes to a dataset. |
| **Pass Through** | Passes data to the next task. |
| **Sticky Note** | Documents the flow in the canvas. |
| **User Approval** | Waits for a user's approval before continuing. In preview. |
| **Knowledge** | Pushes data to a knowledge store. In preview. |
### Configure a task
Select the task on the canvas to open its settings. Required settings have an asterisk. A red warning icon on a task means a required setting is missing.
Open **Advance** to assign task inputs from global variables, and to map output fields to output variables.
For each task's settings, see [Build a flow › Task settings](/console/flows/build-a-flow.md#task-settings).
### Define the flow inputs and outputs
{% stepper %}
{% step %}
#### Open Flow I/O
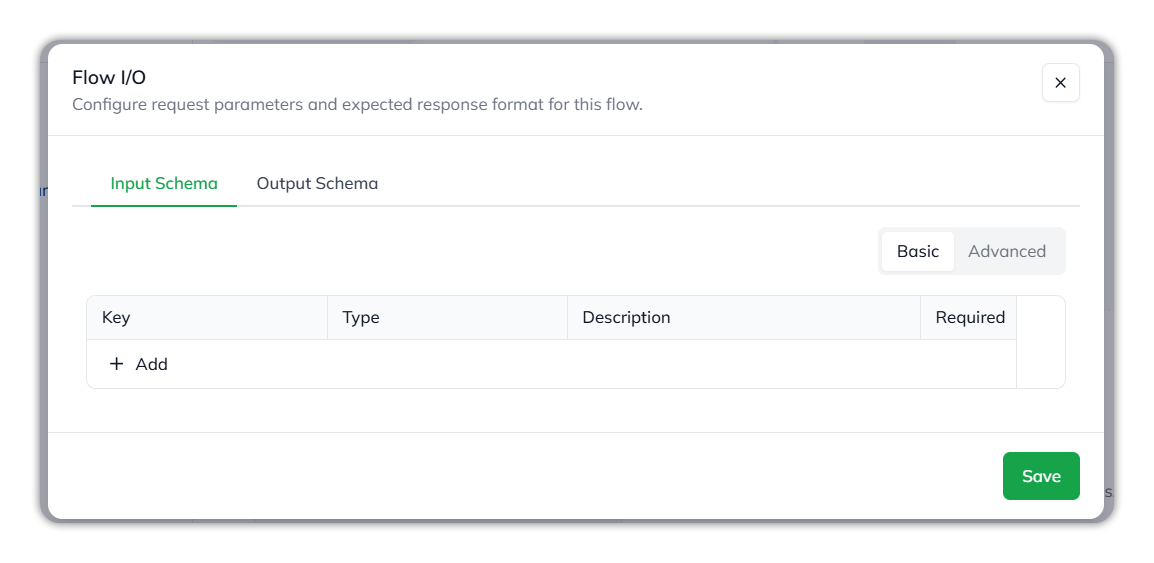
Select **Flow I/O**. It configures the request parameters and the expected response format.
{% endstep %}
{% step %}
#### Choose a schema
Select **Input Schema** for the values the flow receives, or **Output Schema** for the values it returns.
{% endstep %}
{% step %}
#### Add fields
In **Basic**, select **+ Add** and set the **Key**, **Type**, **Description**, and **Required**. To edit the schema as JSON Schema instead, select **Advanced**.
{% endstep %}
{% step %}
#### Save
Select **Save**.
{% endstep %}
{% endstepper %}
Flow I/O.
The types are **Text**, **Number**, **Boolean**, **Object**, **Array**, and **Dropdown**. Input fields also appear on the **Global Variables** tab as read-only entries.
### Add secrets and global variables
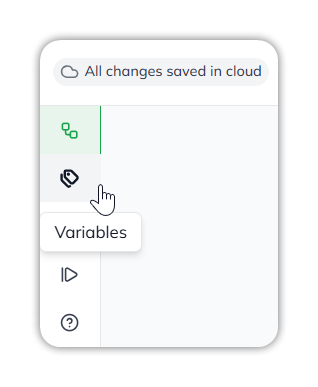
Select **Variables** on the rail.
* **Secrets** — API keys, tokens, and other credentials. Select **Add Secret**, enter a **Name** and **Value**, choose **String** or **JSON**, select **Secured** if needed, then **Save**. Reference it as `$secret.{variable_name}`.
* **Global Variables** — values shared across tasks. Select **Add Variable**, enter a **Key**, choose a type, add a description, select **Required** if the flow can't run without it, then **Save**. Reference it as `$global.{variable_name}`.
Variables, on the rail.
{% hint style="warning" %}
Store credentials as secrets, and reference them in task settings. Don't enter credentials directly in a task.
{% endhint %}
***
## :flask-vial: Test and publish
### Test the flow
{% stepper %}
{% step %}
#### Open Try Out
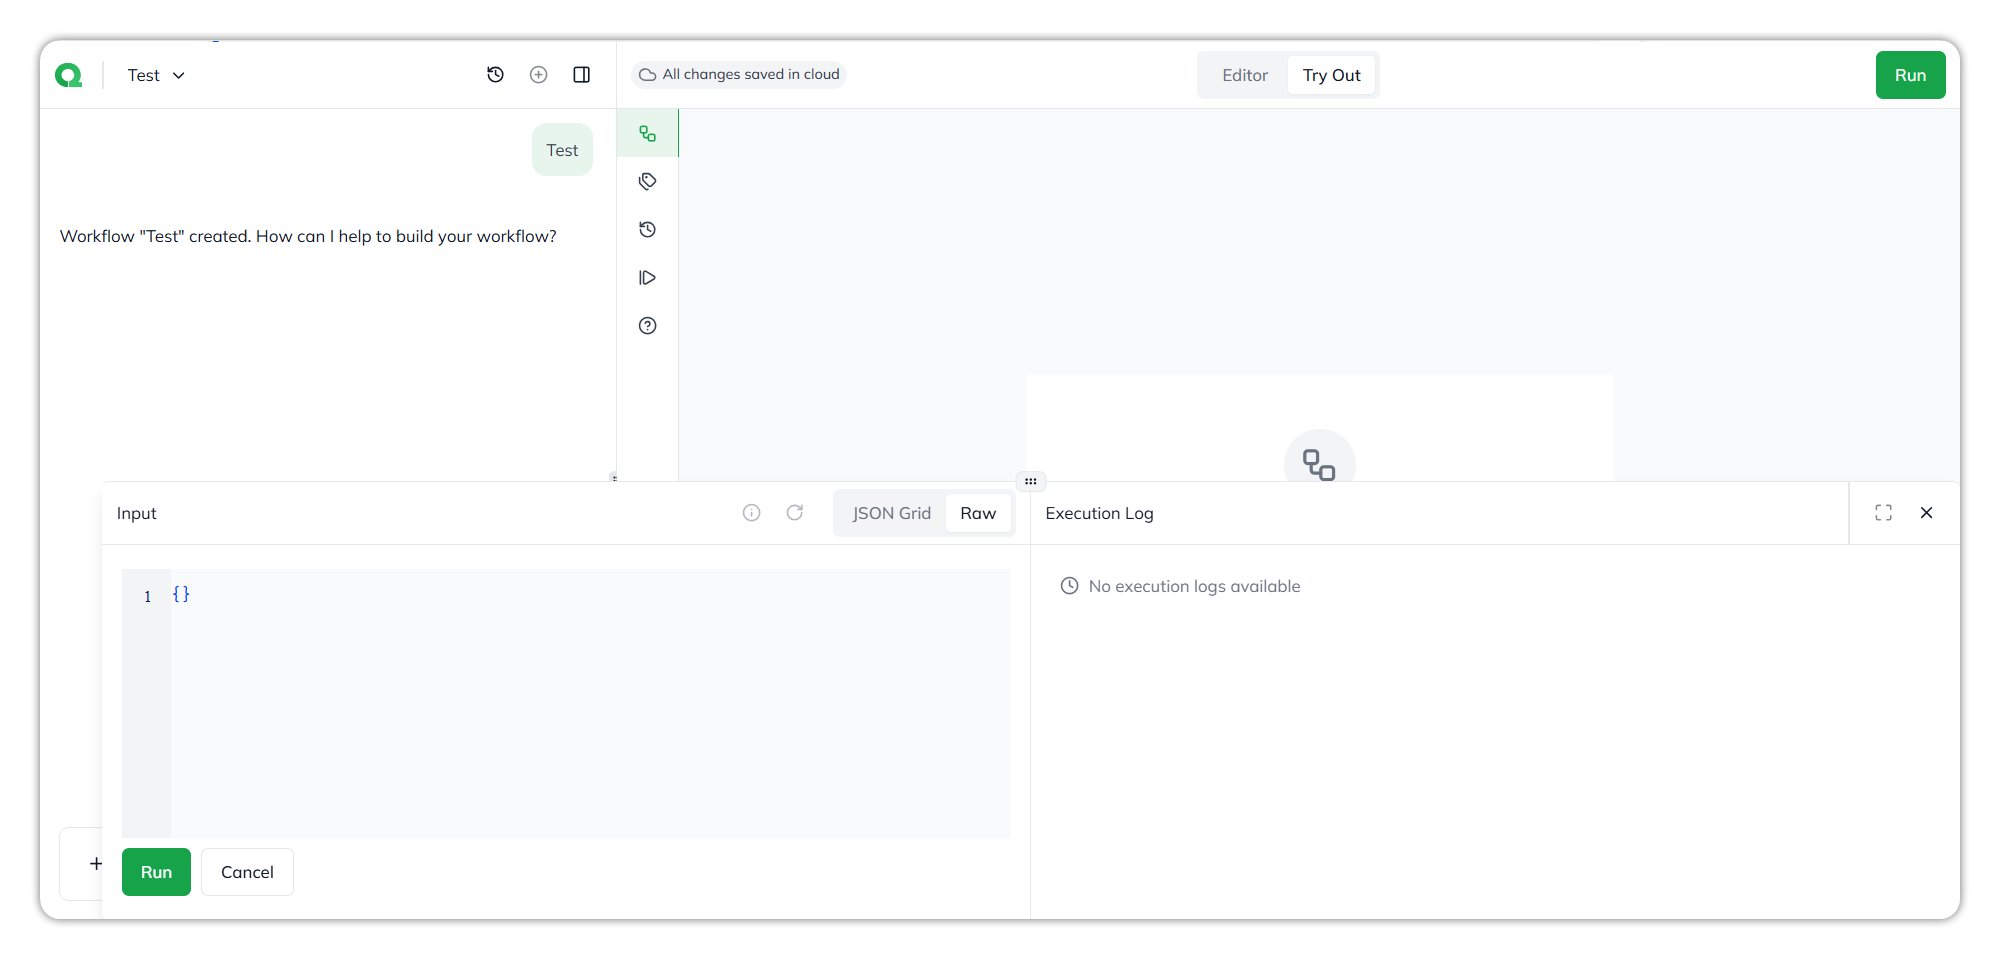
Switch from **Editor** to **Try Out**. The **Input** panel and the **Execution Log** open below the canvas.
{% endstep %}
{% step %}
#### Enter the input
Enter a value for every input field. Choose how:
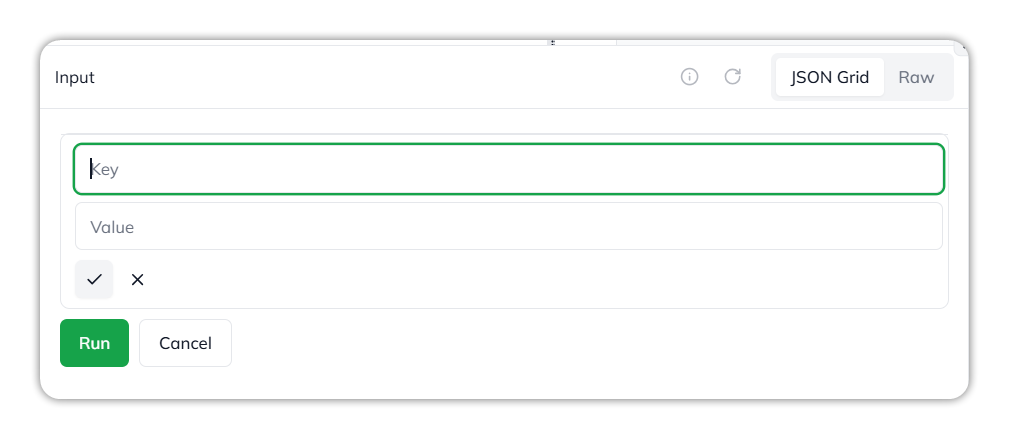
* **JSON Grid** — select **+ Add Entry**, enter a **Key** and **Value**, then select **✓**. Select **✕** to discard the entry.
* **Raw** — type the input as JSON.
Adding an input entry in JSON Grid.
{% endstep %}
{% step %}
#### Run
Select **Run**. The **Execution Log** records each task and its result. Before the first run, it reads *No execution logs available*.
{% endstep %}
{% endstepper %}
Try Out.
### Respond to an approval request
A **User Approval** task pauses the run. Enter the requested `answer`, such as `approve`, then select **Continue**. Select **Cancel** to stop the run.
### Publish the flow
Select **Publish**. Changes stay in a draft until you publish. Publishing makes the draft the current published version.
{% hint style="info" %}
Before publishing, complete every required task setting and check the Execution Log for the results you expect.
{% endhint %}
### Review versions or undo draft changes
Select **Version History** on the rail. It lists the draft, the current published version, and earlier saved versions. To discard the draft and restore the published version, select **Revert Draft Changes**.
Version History, on the rail.
### See past runs
Select **Execution History** on the rail. It lists every run by date, time, and status. Select a run to see what each task did.
Execution History, on the rail.
***
## :robot: Use a flow with an agent
### Let an agent use the flow
Every flow is a skill with the flow's name and description. Choose one:
* **Add the flow as a skill** — in the agent's **Add Skill to Agent** dialog, select the flow on the **Flows** tab. See [Create an agent › Add a flow as a skill](/task-guides/create-an-agent.md#add-a-flow-as-a-skill).
* **Let the agent start the flow** — give the flow the **Start through Agent** trigger.
Your role decides what you can do with flows. Every role can view or trigger a flow. Building, publishing, and managing versions need the Developer, Account Admin, or Organisation Admin role. See [Use flows with agents › Permissions](/console/flows/use-flows-with-agents.md#permissions).
***
## :folder-gear: Manage your flows
**My Flows**, below the prompt on Create New Flow, lists your flows, including flows created from an agent. Each row shows the flow's name, description, and when it was last updated.
### Find one of my flows
* Type part of the name in **Search flows…**.
* Use the list and grid icons to switch how the flows are laid out.
### Open a flow to keep working on it
Select **•••** on the flow's row, then **Edit**.
The flow's ••• menu.
***
## :triangle-exclamation: Common issues
* **A task shows a red warning icon.** A required setting is empty. Select the task, fill it in, and test again before publishing.
* **The flow pauses during a test.** It may be waiting at a **User Approval** task. Enter the requested `answer`, then select **Continue**.
* **A test result isn't what I expected.** Open the **Execution Log**, check the input values and the task settings, then run the test again.
* **My changes aren't live.** Changes stay in a draft until you select **Publish**.
* **I need to undo draft changes.** Open **Version History** and select **Revert Draft Changes**.
***
## :link: Related pages
* [Flows](/console/flows.md), [Build a flow](/console/flows/build-a-flow.md), and [Flow inputs, outputs, and variables](/console/flows/flow-inputs-outputs-and-variables.md)
* [Test and publish flows](/console/flows/test-and-publish-flows.md) and [Use flows with agents](/console/flows/use-flows-with-agents.md)
* Use the flow from an agent: [Create an agent](/task-guides/create-an-agent.md)
***
{% columns %}
{% column width="83.33333333333334%" %}
Maintained by Abhishek Paul AI-assisted, human-approved
{% endcolumn %}
{% endcolumns %}
---
# Agent Instructions
This documentation is published with GitBook. GitBook is the documentation platform designed so that both humans and AI agents can read, navigate, and reason over technical content effectively. Learn more at gitbook.com.
## Querying This Documentation
If you need additional information that is not directly available in this page, you can query the documentation dynamically by asking a question.
Perform an HTTP GET request on the current page URL with the `ask` query parameter, and the optional `goal` query parameter:
```
GET https://docs.uptiq.ai/task-guides/create-a-flow.md?ask=&goal=
```
`ask` is the immediate question: it should be specific, self-contained, and written in natural language.
`goal` is optional and describes the broader end goal you are ultimately trying to accomplish on behalf of the user. GitBook uses it to tailor the answer towards what is most useful for that goal.
The response will contain a direct answer to the question and relevant excerpts and sources from the documentation.
Use this mechanism when the answer is not explicitly present in the current page, you need clarification or additional context, or you want to retrieve related documentation sections.