> For the complete documentation index, see [llms.txt](https://docs.uptiq.ai/llms.txt). Markdown versions of documentation pages are available by appending `.md` to page URLs; this page is available as [Markdown](https://docs.uptiq.ai/ai-workbench-qore/console/agent-builder/deploy/authentication.md).
# Access & Security
Issue the keys that let applications call the agent, and limit where its widget may run.
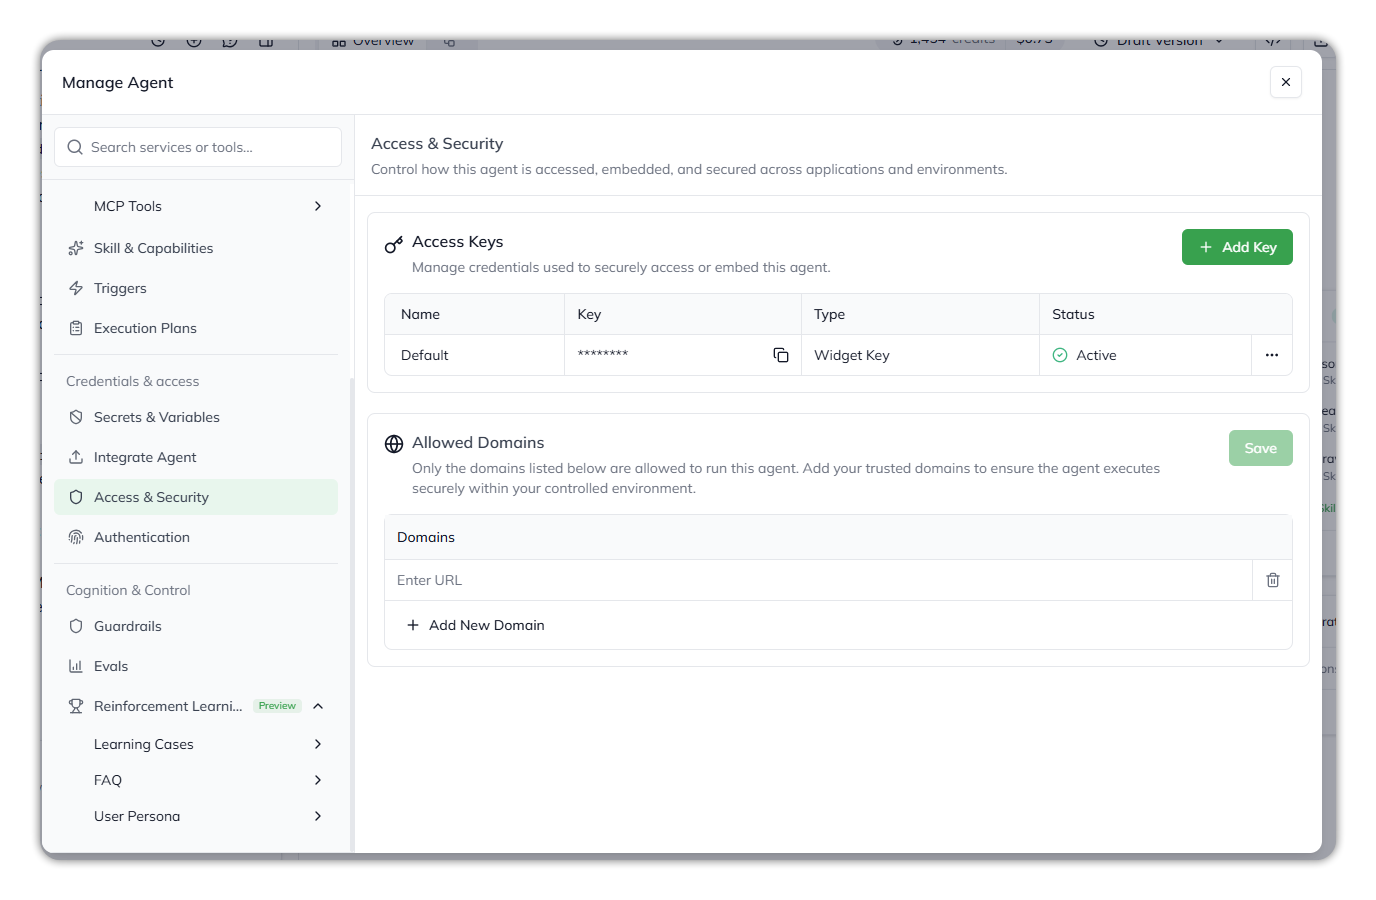
**Access & Security** controls how the agent is reached from outside the platform. It has two sections:
* **Access Keys**: the API keys and widget keys that applications use to call the agent.
* **Allowed Domains**: the web origins where the agent's embedded widget may run.
The keys and domains set here are the same ones the [Integrate Agent](/ai-workbench-qore/console/agent-builder/deploy/agent-integration.md) panel uses, so you can manage them from either place.
To open it, go to **Agent Config** and select **Access & Security** under *Credentials & access*.
Access & Security, with Access Keys above and Allowed Domains below.
### Access Keys
The **Access Keys** table lists the agent's credentials.
| Column | What it holds |
| ---------- | ---------------------------------------------------------------------------------------------------------------- |
| **Name** | A friendly name for the key, for example `Default`, `Production Widget` or `Mobile API`. |
| **Key** | The credential value, displayed masked as `********`. Select the copy icon beside it to copy the unmasked value. |
| **Type** | **API Key** or **Widget Key**. See [Key types](#key-types). |
| **Status** | **Active**, or deactivated (the row is dimmed). A deactivated key is no longer accepted. |
Each row has a `⋯` menu with **Rename** and **Deactivate**.
### Key types
The type of key you create depends on how the agent will be called.
* **Widget Key**: used by the Embedded Chat widget and the TypeScript SDK client from [Integrate Agent](/ai-workbench-qore/console/agent-builder/deploy/agent-integration.md). It's safe to ship in browser code, because a widget key works only from the platform itself and the domains on the [Allowed Domains](#allowed-domains) list.
* **API Key**: a key and secret pair for server-to-server calls to the Agent API. The key is sent as `x-api-key`, and the secret as `x-api-key-secret`.
{% hint style="warning" %}
**The API secret is shown once, when the pair is generated.** The Access Keys table shows the key, never the secret. If you didn't record it, create a new API key and switch your integration to it. Keep both values server-side; the widget key is the only credential here that may ship in browser code.
One exception: **Download as MD** on the Agent API tab of Integrate Agent has an **Include secrets** option that writes the agent's API key and secret into the downloaded file. Treat that file as a credential.
{% endhint %}
### Working with keys
#### Adding a key
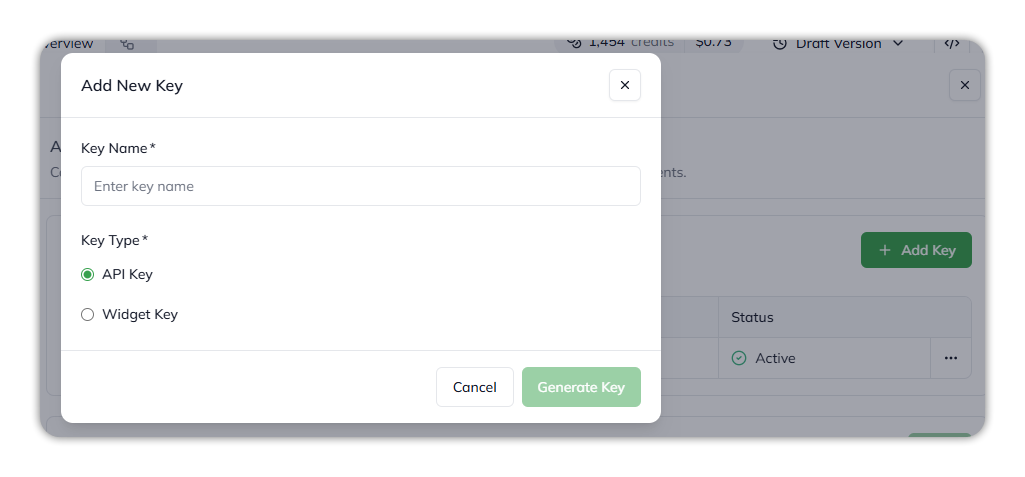
The Add New Key dialog.
1. Select **+ Add Key**.
2. Enter a **Key Name**.
3. Choose the **Key Type**: **API Key** or **Widget Key**.
4. Select **Generate Key**.
The dialog then shows the new key, and for an API key, its **API Secret**. Copy both before you close the dialog: for security reasons, they can't be retrieved later.
#### Copying a key
Select the copy icon next to the masked key in the **Key** column. The platform places the unmasked value on your clipboard. The display stays masked.
#### Renaming or deactivating a key
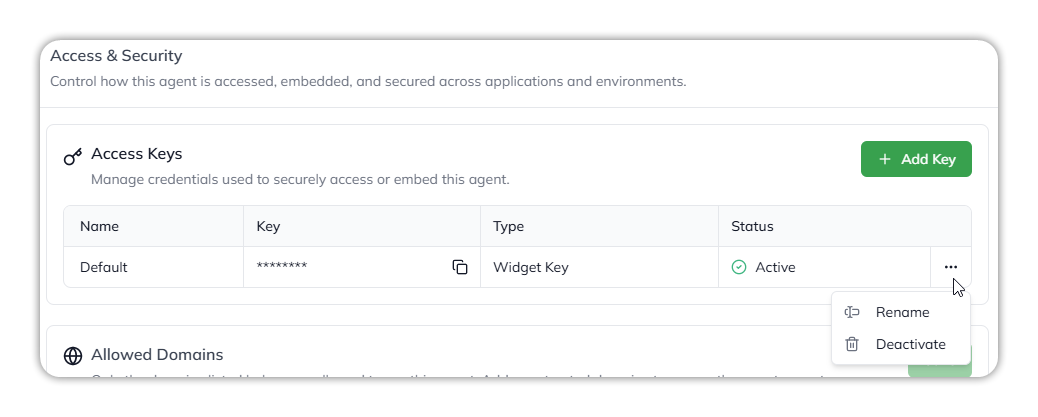
Each key's menu.
Open the `⋯` menu on the row:
* **Rename** changes the key's name. The key value doesn't change.
* **Deactivate** stops the key from being accepted. **This can't be undone**: a deactivated key can't be used again.
There's no rotate action. To replace a key, add a new one, move your integrations to it, then deactivate the old one.
> **Important** Treat the unmasked key as a secret. Anywhere the key is pasted (application code, environment variables, configuration files) should follow the same handling rules as any other credential. Do **not** paste it into Instructions or commit it to a public repository.
### Allowed Domains
**Allowed Domains** lists the web origins where the agent's embedded widget may run. A request made with a widget key is accepted only when the page it comes from is on this list, or is the platform's own domain. Anything else is refused. This is what stops your agent, and the data and quota behind it, from being embedded on a site you didn't authorize.
* **With the list empty, the widget runs nowhere outside the platform.** Add every domain where you embed it.
* **The list applies to widget keys only.** API-key calls are server-to-server and have no web origin, so they're checked by the key and secret alone.
#### Adding and removing domains
1. Select **+ Add New Domain**. A new row appears.
2. Enter the URL or domain in the **Enter URL** field.
3. To remove an entry, select the trash icon on its row.
4. Select **Save**. Changes take effect only after you save.
The **Whitelist domains** step of the Embedded Chat setup on [Integrate Agent](/ai-workbench-qore/console/agent-builder/deploy/agent-integration.md#embedded-chat) adds to the same list.
{% hint style="warning" %}
Enter each domain exactly as the browser sends it, and test it against your intended origin before you rely on it in production. A mismatch in protocol, subdomain or port is refused like any other unlisted origin.
{% endhint %}
For each environment where the widget is embedded, add its specific origin:
* `https://app.example.com`: production app
* `https://staging.example.com`: staging environment
* `http://localhost:3000`: local development. Remove it before the agent goes to production.
### Security considerations
Three settings together govern how the agent is reached from outside:
* **Access Keys** on this page: which credentials are valid.
* **Allowed Domains** on this page: which web origins the widget may run on.
* [**Authentication**](/ai-workbench-qore/console/agent-builder/deploy/authentication-1.md): which person is calling, verified against your identity provider.
What kinds of integration you expose is set up on [Integrate Agent](/ai-workbench-qore/console/agent-builder/deploy/agent-integration.md). A tight key list with a tight domain list produces an agent that's hard to call from anywhere you didn't intend. Loosening either one, by sharing one long-lived key everywhere or adding domains you don't need, widens the agent's exposure.
### Why this matters
Keys are how an integration introduces itself to the agent at runtime. A leaked key (pasted into a public repo, exposed in a client-side bundle, or caught in a screenshot) is effectively the right to call the agent on your behalf. Name keys descriptively so you know which to replace when something goes wrong, and give each integration its own key. Sharing one key across all of them means deactivating it takes every integration down at once. Audit the domain list the way you'd audit a firewall rule: add origins deliberately and remove the ones you no longer need.
***
{% columns %}
{% column width="83.33333333333334%" %}
Maintained by Abhishek Paul AI-assisted, human-approved
{% endcolumn %}
{% endcolumns %}
---
# Agent Instructions
This documentation is published with GitBook. GitBook is the documentation platform designed so that both humans and AI agents can read, navigate, and reason over technical content effectively. Learn more at gitbook.com.
## Querying This Documentation
If you need additional information that is not directly available in this page, you can query the documentation by asking a question.
Perform an HTTP GET request on the following URL with the `ask` and `goal` query parameters:
```
GET https://docs.uptiq.ai/ai-workbench-qore/console/agent-builder/deploy/authentication.md?ask=&goal=
```
`ask` is the immediate question: it should be specific, self-contained, and written in natural language.
`goal` is what the user is ultimately trying to achieve, the reason they need the answer. Sharing it helps GitBook give you a better, more relevant answer. A goal is most helpful when it describes the outcome the user wants rather than restating the question. For example, with `ask=how do I create an API token`, a goal like `automate deployments from our CI pipeline` lets GitBook tailor the answer to that use case.
The response will contain a direct answer to the question and relevant excerpts and sources from the documentation.
Use this mechanism when the answer is not explicitly present in the current page, you need clarification or additional context, or you want to retrieve related documentation sections.